-40%
Learn to build your own solar cells panels diy kit AND 10 AMP CHARGE CONTROLLER
$ 50.1
- Description
- Size Guide
Description
HEART OF THE SUN-SOLARSells many items needed to build your own solar panels, solar cells, junction boxes, tabbing wire, buss wire, solder, soldering irons, EVA encapsulation, rosin flux pens, MC-4 connectors, and more. visit my store for a complete list. Not sure what you need send me a question and some details. Brian
THIS COMBINATION IS FOR MY BEST SELLING DIY KIT AND A 10 AMP CHARGE CONTROLLER, ALL PRODUCTS IN EACH SEPARATE ITEM ARE INCLUDED IN THIS COMBINED SALE, JUST LIKE YOU BOUGHT THEM SEPARATELY NOTHING OMITTED.
For more items, please visit my Ebay store where I have over 100 items for sale!
Check out my
other items
! Be sure to add me to your
favorites list
Some recent feedback from customers who bought this kit.
Each one of these feedback messages was sent by the buyer, although I do ask for feedback to be sent I never tell the buyer what to say. You can go to our feedback and read every one like we do. We have very little negative or neutral feedback because we do a great job with fast delivery and a great product.
Fast Shipping!! Great how to video too!
Excellent, shipped fast
Great seller
excellent seller, 100 % recommended
fast delivery, great learn how to build solar cell panels, thank you
Excellent kit, great service!
Great seller!!! Can t wait to buy more! Thanks!
Fast shipping, I recommend highly. High quality
great
"nice kit"
"Super fast shipping! Product is exactly what was ordered. Plenty of contact info"
"5 star ebay seller smooth transaction, very satisfied customer, Highly recommend"
"Received in good conditions."
"Quick to ship, Excellent Service!"
"good purchase experience"
"Product exactly as shown in picture, fast shipping, excellent quality product!!!"
"As promised. Well recommended. Thanks."
"pleased with what I got"
"Exactly as promised. Thanks!"
"thank you for the great deal on the startup kit"
THIS KIT IS A GREAT WAY TO LEARN WHAT IT TAKES TO BUILD A SOLAR PANEL WITHOUT A LARGE INVESTMENT IN TIME OR MONEY!
What sets this kit apart is the instructions: We have spent many hours making a very detail CD Updated often from customer input. Also the amount of products included in the kit is more than most "kits" out on ebay.
Look at pictures 3 and 4, picture 3 shows cells cut from 2BB( buss bar) cells where the collector line is more centrally located, picture 4 show cells cut from 3BB( buss bar) cells where the collector line is more to one side. I use mostly 2BB cells, occasionally I use 3BB cells.
Some kits I see don't even have an amount of tabbing included to be able to finish tabbing all the cells. Before you buy do the math ( 2 x the length of the collector line times the amount of collector lines), you need that amount PER CELL.
This kit is perfect for the curious novice who wants to start building his/her own solar panels. We will set you up with all the materials and knowledge you need to get started.
If at any time you do not understand something, you will have our e-mail address for
free online help!
This kit is Solar 101 (I wish I had that class in college!)
Our mission statement is for everyone to have fun building this panel and to give you the confidence
and knowledge to build a solar panel out of even larger cells without getting in over your head and getting frustrated!
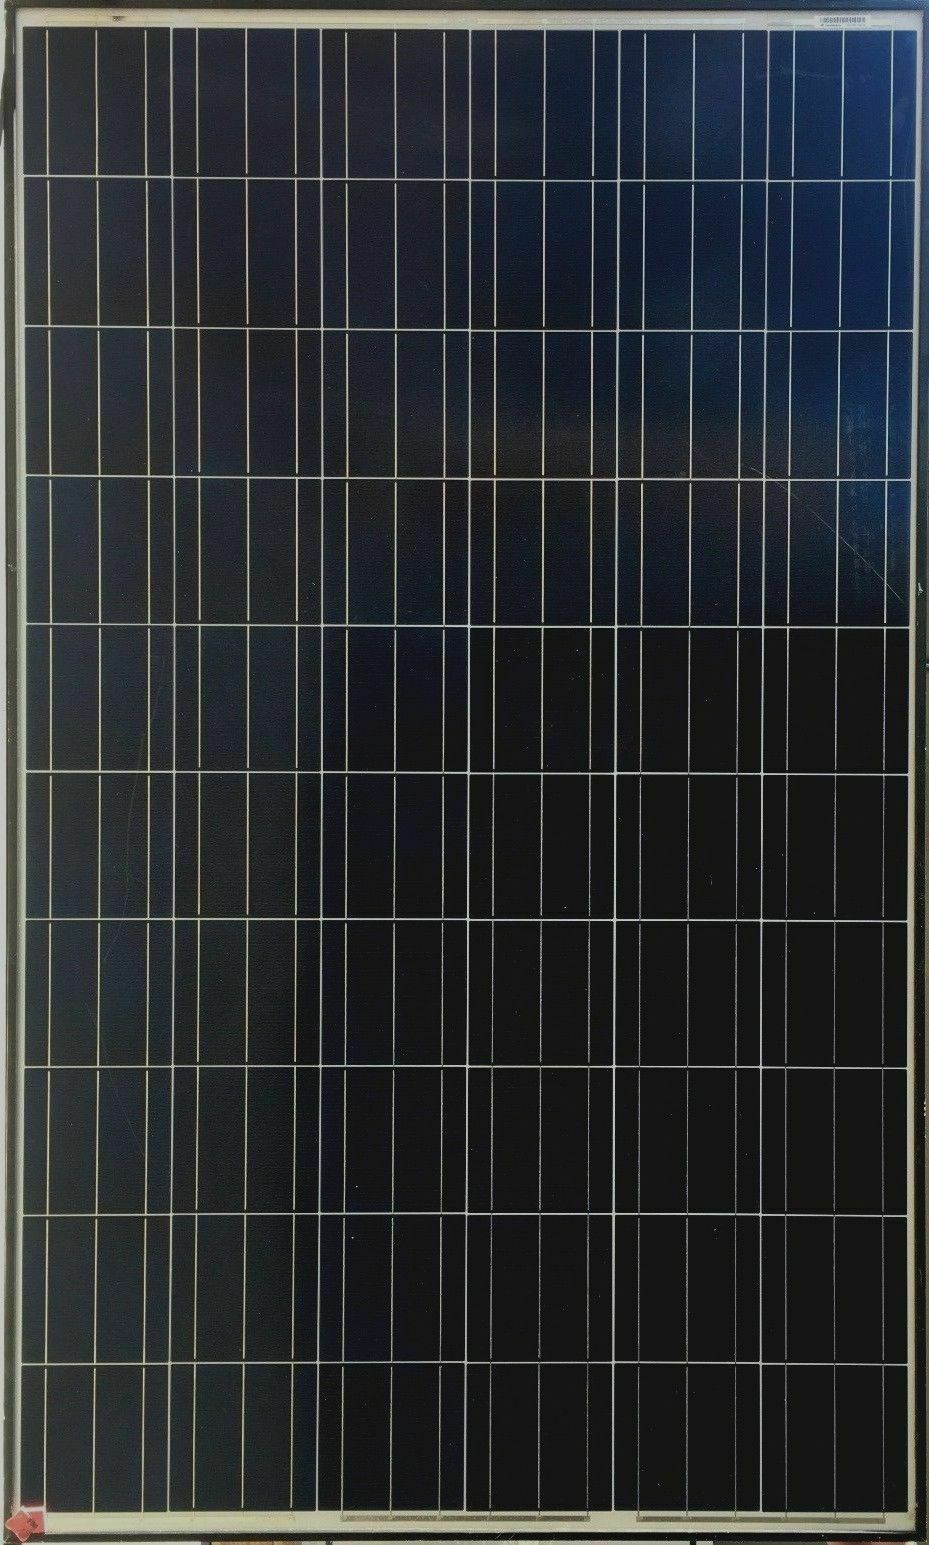
When complete, you will have a **30+ watt panel to be proud of!
more accurately .521 volts at 2.03 AMPS Factory tested under STC ( standard test conditions)
STC ...
Solar Panel manufacturers use what is called Standard Test Conditions (STC). This means they put the solar panels in a flash tester in their factory that has been calibrated to deliver the equivalent of 1000 watts per square meter of sunlight intensity, hold a cell temperature of 25'C (77'F), and assume an airmass of 1.5. This flash test gives them their STC ratings. Consider these as you would EPA mileage ratings ... how many of you actually get the mileage they post?
the math on these cells using STC is 36 (cells) X .521V = 18.756 V x 2.03 A = 38.08 watts. knowing the chances of achieving "test results" in real life I say 30 plus watts
No other solar item seller will tell you about STC but HEART OF THE SUN-SOLAR.
INTERNATIONAL BUYERS:
We offer this item " free shipping to USA
, that mean a portion of the cost is the USA shipping cost, for the
international buyers
you will get charged LESS then it actually cost to ship to you. And we pass on to you our discount from the post office as well.
Here is what's included in your kit (and why)
:
45, 3" X 3" Square, Solar Cells (Rated at 2 amps each)
These cell are easy to work with. We give you 45 cells because handling cells is tricky, and you will most likely break a few. No worries! You will only need 36 to complete our suggested panel.
25 feet of tabbing wire (22.5 is needed)
Flat, skinny wire used by professionals to connect cells together. You need 6 inches for each cell, so this gives you a bunch extra to experiment with.
48 inches of bus wire
Wider, thicker wire used as a common connection point for multiple connections. The more current flowing, the thicker the wire needed.
2 feet of 18 gauge black and red wire:
You will attach these wires in the junction box.
One blocking diode: 3 amp
A blocking diode is a semiconductor device used to stop the flow of current from one direction, but allow it in the opposite direction; a one way street sign for electricity. When the panel is making electricity, it will flow into your battery and charge it. However, if the sun goes behind a cloud, the charged battery would try to flow backwards into the panel, draining the battery and/or potentially damaging the cells. The blocking diode prevents this
back-flow
from the battery.
50 spacers
Keeps the glass front and the plastic back from putting unwanted pressure on the cells.
O
ne Rosin Flux Pen
Helps adhesion and solder flow.
One roll of regular leaded solder 170cm.
This is leaded solder, which has a lower melting temperature and is easier to use (in my opinion) than the "No lead" type.
One basic Junction Box
Attaches to the back of the panel for connecting wires from inside and outside the panel.
INSTRUCTIONS! INSTRUCTIONS! INSTRUCTIONS!
(The instructions are contained on a CD, which saves paper and enhances the picture quality!)
Includes:
* 3 videos, 32 pictures, and 35 pages of detailed step by step instructions!
* My e-mail address to ask any questions( seriously that email goes right to me)
* How to solder tabbing wire on your cells
* How to connect tabbed cells together
* Connecting strings of cells
* How to attach the plastic backing and junction box
* How to test your connected cells
* How to make a frame and attach the frame
it is all covered on the CD.
* A list of tools and supplies needed to complete the project
* A web site I found to have a wealth of FREE information
* The name of a great magazine that has so much information
in it all geared for the home owner
You will need a soldering iron. I recommend a 40 watt most 20 and 30 watt irons just are not hot enough, the adjustable soldering iron stations are wonderful.
I do sell these 40 watt soldering irons and the adjustable soldering iron stations in my store.
Soldering iron: 40 WATT is
recommended
, either the gun style or the stick kind, chisel tip (Not a pencil tip. However, I show how you can modify a pencil tip on the instructional cd)
Not absolutely necessary, but very helpful
.
A VOLT METER( MULTI-METER)
I do sell these multi-meters in my store.
Additional items you need for this project
NOT
included in this kit:
A tube of silicone (clear) [Hardware store]
A sheet of window glass use a piece 36" x 18" ( 46cm x 92 cm) [Hardware stores typically sell a pre-cut 36 x 18]
A sheet of plastic also 36” x 18” 1/4 inch thick ( .5 -.6 cm)
If you intend to charge a deep-cycle battery you will need a small charge controller. This will act like the diode and will give the battery electricity in the way the battery prefers.
I do sell these charge controllers in my store.
TWO 8’ x 1/2" ( 2.44 M x 13mm) aluminum c-channel for frame.[H
ardware store]
Two very useful electrical current and wattage equations are:
I: Current (in Amps)
,
V: Voltage (in Volts)
,
P: Power (in watts)
Watt's Law
(
I
*
V
=
P
)
So our equation for this panel is: I tend to use even rounded Down numbers
36(cells) *
0.5
volts each)
=
18(Volts Total)
*
using
Watt's Law:
I *
18V
=
36
WATTS
More accurately the math on these cells using STC is 36 (cells) X .521V = 18.756 V x 2.03 A = 38.08 watts
*The reason It's a 18 volt panel is to charge a 12 volt battery. 12 Volt batteries rest at close to 14 volts fully charged and need more then 12 volts to charge fully. 18 volts is the Industry standard on best voltage to charge a 12 volt battery. Also 18 Volts is the normal because on many day your 18 volt panel may not be producing its full 18 volts it may be only producing 14-18 v depending on weather, angle to sun, time of year ETC. Always use a Charge Controller (CC) when charging 12 volt batteries with a s18 volt solar panel or you can damage the battery by overcharging.
What buyers have said about the kit:
(NOTE : These are reviews of my original kit. The new version includes more items, amended instructional material, and more powerful cells.)
"Positive experience, happy with the product." -cful50
"Shipping was great had it in 2 days, he was also very helpful about questions." -biker133
"GREAT: best cd and info I have found anywhere, great job, thank you. shipping A++" - alagambler
"Quick shipment, great communication, easy to understand instructions. THANKS" -hdie6639
"Seller really tries to please the customer." -longra09
"A good deal." -skroghsk405smk
"Kit worked great THANKS." -sevenkellys
"Good package, fast delivery, shall do more business with this seller, A+." -albertmsct1871
"Very detailed instructions, A++ seller"-grandtreasurtrove
You can go to my feedback and read all of these and more!
Disclaimers:
Some of the cells in the kit will have small chips on the edges; they are cut from larger cells and it is just part of the process due to their delicate nature.
Some of the pictures in the ad are of a completed panel. This is an example of a panel you will construct with the kit. Kits do no include a completed panel!
**THE CELLS ARE CUT FROM THE 6" X 6" CELLS I HAVE FOR SALE. THEY ARE RATED OVER 8 AMPS EACH.
CELLS ARE RATED WITHOUT ANY COVERINGS. ONCE YOU PUT A GLASS FRONT ON YOUR PANEL, EXPECT A LITTLE LESS OUTPUT THAT IS WHY I SAY 30(watts)+ WITH A 36(watt) MAX.
CMP12 solar charge controller is able to adjust the charge current and decide if to supply the loads electricity according to the voltage of battery.Compatible with 240W solar panel, Max current is 10A
CMP12 10A Solar Charge Controller comes with instruction booklet.
Function:
According to the voltage of battery, controller will adjust the charging current and decide if to supply power to the loads.
Generally keep the battery on full voltage condition.
Prevent the battery from over-charging.
Prevent the battery from over-discharging.
Prevent the battery from supplying power to solar panels during nights.
Indicator light
:
There are 3 red LEDs indicating the voltage level of battery. The battery is full when all 3 LEDs are lighting. When 1 or 2 LEDs are lighting, it means the battery is on the low level, where the loads may not working properly. As the voltage of battery reaches 12.6, the loads will automatically resume working.
The battery is being strongly charged when the “Charge LED” is lighting. The battery is floatingly charged when this LED is flickering, and the battery has stopped charging when the LED is off.
The “Load LED” indicates the working condition of loads. When it lights, it means the load may work; when it’s off, it means the load may not work.
THIS IS NOT WATERPROOF, MOUNT IT INSIDE OUT OF THE WEATHER.
CMP12 Data Sheet
Model:CMP12
Rated Voltage:DC12V/24V
Max Current:10A
Full Charge Cut:13.7V/27.4V
Low Voltage Cut:10.5V/21V
Temp compensation:-3mv/℃/cell
Zero Load Loses:≤20mA
Min Wire Size:≤20mA
Min Wire Size:2.5mm^2
Voltage Drop:<210mv
Working temperature: -10~60 degrees C;
Storage temperature: -30~70 degrees C;
Dimension: 95*102*36mm;
Weight: 0.14KG.
CMP12 Solar Charge Controller
10 AMP 12V/24V auto switch
PHOTOVOLTAIC CHARGE CONTROLLER
INSTALLATION AND OPERATION MANUAL
IMPORTANT SAFETY INSTRUCTION
Connect the controller to your battery first and then connect solar panel and inverter or applications
.
Function:
According to the voltage of battery,
controller will adjust the charging
current and decide if to supply power to the loads.
1.Generally keep the battery on full voltage condition.
2.Prevent the battery from over-charging.
3.Prevent the battery from over-discharging.
4.Prevent the battery from supplying power to solar panels during nights.
Connection:
As indicated in diagram:
1. Connect “+” and “-“ poles of solar panels with the correct ports on the controller (the first and second from the left).
2. Connect”+” and “-“ poles of battery with the correct ports on the controller (the third and fourth from the left).
3. Connect “+” and “-“ poles of load with the correct ports on the controller (the fifth and sixth from the left).
Indicator light:
1. There are 3 red LEDs indicating the voltage level of battery. The battery is full when all 3 LEDs are lighting. When 1 or 2 LEDs are lighting, it means the battery is on the low level, where the loads may not working properly. As the voltage of battery reaches 12.6, the loads will automatically resume working.
2. The battery is being strongly charged when the “Charge LED” is lighting. The battery is floatingly charged when this LED is flickering, and the battery has stopped charging when the LED is off.
3. The “Load LED” indicates the working condition of loads. When it lights, it means the load may work; when it’s off, it means the load may not work.
Notice:
1.Please check the rated voltage of solar panels, battery, and load before connecting. Their rated voltage should be same (12v).
2.Pay more attention to “+” and “-“ poles of solar panels, battery, controller and
loads during the process of connection.
3.The rated current of solar panels and loads must be less than the one of controller.
Data Sheet
• Model:CMP12
• Rated Voltage:DC12V/24V
• Max Current:10A
• Full Charge Cut:13.7V/27.4V
• Low Voltage Cut:10.5V/21V
• Temp compensation:-3mv/℃/cell
• Zero Load Loses:≤20mA
• Min Wire Size:≤20mA
• Min Wire Size:2.5mm^2
• Voltage Drop:<210mv
• Working temperature: -10~60 degrees C;
• Storage temperature: -30~70 degrees C;
• Dimension: 95*102*36mm;
• Weight: 0.14KG.
Thank you for visiting!
Check out my
other items
! I have hundreds of other solar related items for sale.
Be sure to add me to your
favorites list
! So you can find my store easily, you know you will be back!!!
Sign up for my email newsletters
by adding my eBay Store to your Favorites, you will receive a newsletter telling you of items on sale and new items.
Stores
Froo www.froo.com | Froo Cross Sell, Free Cross Sell, Cross promote, eBay Marketing, eBay listing Apps, eBay Apps, eBay Application


